Making a Copper wire tree

Hello! 

Who doesn't like the crafting? Every one likes crafts. You may not do the crafts, but probably you like it. I enjoy crafting, so I'm started this blog.

Today I'm doing the Copper wire tree. We all know that copper is costly but I took copper wires from waste electronic gadgets like tv, bulb, etc. Which is present inside the transistor.
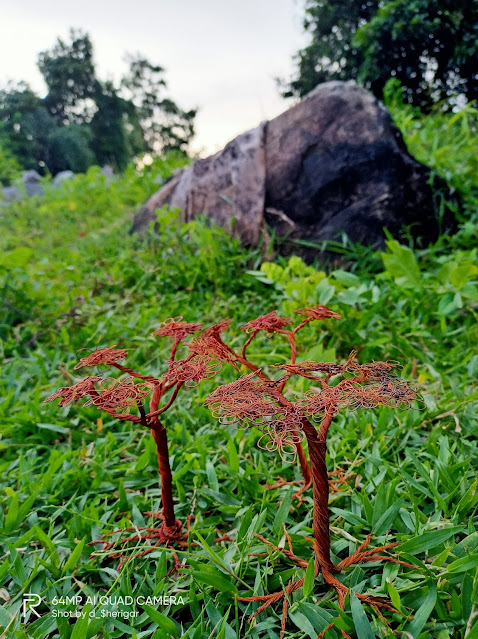

Let's get started...

To do this craft you need copper wires and cutter.

1. Take copper wires and cut them into pieces of 20cm long. ( You can vary the length it's your choice. )

2. Twist the bunch of copper wires, 5cm  from the bottom.


3. To make the roots, the bottom wires should be twisted and divided into four main roots. Repeat the same process with divided wires to get sub roots.


4. Then for the top part, first divides the wires into two branches. Take one branch and again divides into small branches.

5. Then twist them and do random flower shape.

6. Do small flower shapes and add on the present flowers.


7. Repeat the same process with another branch. Now your copper wire tree is ready.


Thank you! for reading. If you have any suggestions please comment below.

Hope you enjoyed it, Happy Crafting😊.

Comments

Post a Comment

Popular posts from this blog

How can we do the water fountain using Newspaper!

 Hello, everyone  Today we are doing simple a showpiece water fountain by using newspapers. Materials required are: Newspapers Glue Cardboard Glue gun Paint and brush Let's do it... 1. Cut the newspaper into rectangular pieces, then by using the stick roll the newspaper starting from the corner of the newspaper and keep moving it across the newspaper, Roll it to the end of the newspaper and secure the end with a help of glue. Repeat the same process and make 30 tubes. 2. Flat these paper tubes by using a finger and make a ring by wrapping the paper tubes around the thin stick. Repeat the process and make 5 rings. Do the same process but use a glue cap instead of a thin stick and make 2 rings. 3. Give the rings a cup structure. 4. Then join 2 rings of different structures to make a pot as shown below. 5. Color these pots using paint and brush. 6. For the base use the cardboard, wrap it by using the paper, and color it. 7. Do the pillar of height 14cm and 11cm by rolling th...

Craft from pistachios shells!!🤯

Hello!! Welcome to the new blog.  Who doesn't like pistachios!? Almost all like pistachios. But may  not do a craft with pistachios shells. So, today you will get a new craft from best out of waste. Today's craft is a  simple wall decor using pistachios shells.  Let's get started... Materials required are: Cardboard Pista shells Jute threads  Glue Newspaper 1. Take a cardboard and cut it into a rectangular shape. 2. Do the flower by following the below steps.   Take a small piece of paper to apply glue. Stick one by one pasta shells. Stick beads on the center of the flowers. 3. Make one more flower by attaching one post shell to another. 4. Then make a paper tube from the  newspaper, roll the newspaper starting from the corner and keep moving it across the newspaper roll it to the end of the newspaper and secure the end with the help of glue. Stick two of the paper tubes. 5. Wrap the paper tubes with jute threads. 6. Stick all the flowers on frame as s...

Wall decor from Peacock fethers

 Hello!  Today we are doing amazing wall decor from the beautiful peacock feathers. It is very simple and too easy to do. Materials required are: Glue Cardboard Peacock feathers Paint and brush Let's begin... 1. Cut the cardboard into a circle of diameter 32cm. 2. Now take a circle of 8cm diameter, draw an inner circle of 6cm diameter then paint the inner circle with black color and draw a simple art of Krishna. 3. Cover the reaming portion with small pieces of peacock feathers. 4. Attach the peacock feathers of the same size on the cardboard as shown below. 5. Then attach the first craft (where we drew Krishna) in the middle of the wall decor. Hope you enjoyed this Craft. Thanks for reading, Happy Crafting!.